
Half Rectangle Triangles & Everything You Need To Know About Them!
Do you read a quilt pattern and the minute that you read that it contains half-rectangle-triangles (HRTs) want to run and hide? Believe me I totally understand (I have a similar relationship with flying geese, but we’re working on it!) Well this blog post is here to help with all your HRT wows!
I have broken down each and every step of making HRTs and even made my first ever You Tube video to support it and help those that would prefer to watch me make and trim them then read through it.
Any Made Just Sew pattern which has HRTs uses this mehtod. But below you will find a cutting chart to show you how to apply the same techniques I use in this blog and apply them to any size HRT you may come across in any pattern.


So let’s get started and make some HRTs together!
The first thing to take note of is that HRTs are not made the same way as HSTs (half square triangles). You don’t lay your fabrics on top of each other face to face, you have to twist the top fabric or else you make an aeroplane shape rather than a rectangle. (see fig 1-3). Because of this twist you make right-sided or left-sided HRTs depending on which way you twist the top fabric.

Fig 1: DON”T lay your fabric directly on top to match…

Fig 2: … if you do you will make an aeroplane shape and not a rectangle
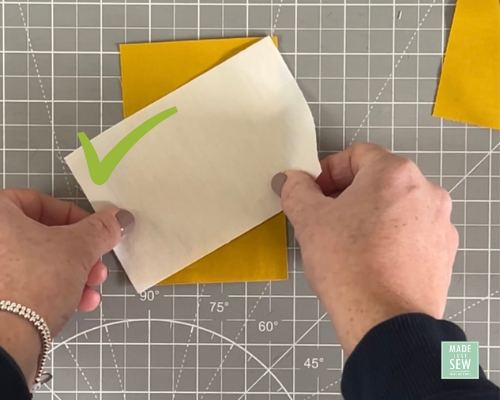
Fig 3: Instead twist the top fabric
The next step is to draw a line across the diagonal of the fabric and sew a 1/4” line either side of that drawn line. Then you need to cut along the diagonal and press the seams open. You’ve made an untrimmed HRT!

Fig 4: Draw a line across the diagonal.

Fig 5: Sew 1/4” either side of the drawn line.
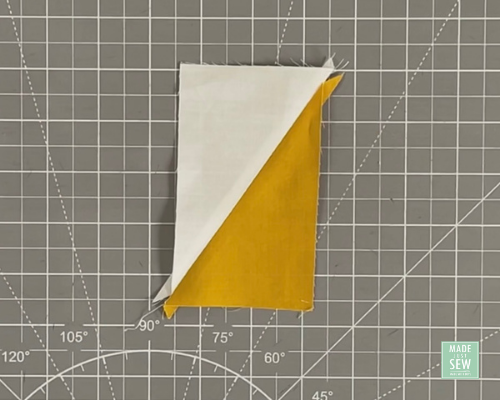
Fig 6: Cut along the line and press open seams to produce an untrimmed HRT.
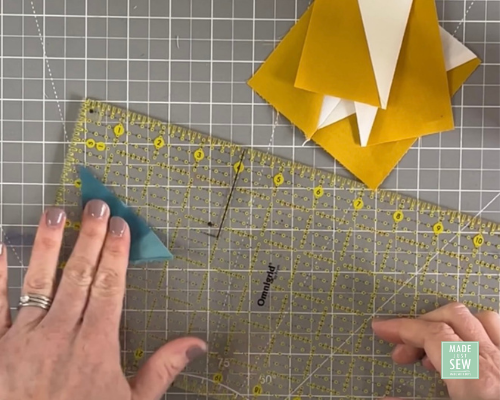
Grab your Sharpie Pen - it’s time to trim your HRT blocks to size! And I know what your thinking ‘is she mad! I’m not going to mark my ruler with a permanent pen!’ - trust me, it works and it will be removed at the end.
You need to mark a dot at the intersection points for your sized HRT (see quilt pattern or table above). Once you’ve made the dots you need to lay these on the diagonal seam line (fig 8) making sure the finished trimmed size covers the fabric.


Fig 7: Grab your Sharpie pen to mark the intersection points directly onto your ruler with a dot.

Fig 8: line the dots on the diagonal seam line.

Fig 9: *TIP; mark the finished trimmed size with your Sharpie pen to make sure the finished size covers the fabric.

Trim the right and top edge of the block with a rotary cutter. Turn the block 180 degrees so the two edges you have just trimmed, line up with the finished trimmed size (drawn lines on the ruler - if you did this!). The two intersection dots should also line up on the diagonal line. Trim the right and top edge as before.

Fig 10: Trim the right hand side

Fig 11: Trim the top

Fig 12: Turn the block 180 degrees, line the straight bottom and left edge with the finished trimmed size and the line the dots on the seam line. Trim the right and top edge.
You would had noticed that the example I have used so far has been for trimming right-sided HRTs. You apply the same technique to trim left-sided HRTs using the left hand-side of your ruler. (Fig 13-15)


Fig 13: Trimming left-sided HRTs.

Fig 14: If you struggle to trim the left hand side of the ruler, flip your block over and trim as if it was a right-handed HRT block!

Fig 15: A left-handed HRT block flipped over and trimmed using the right hand side of the ruler.
The trimmed HRTs should have a slight indent at the points. (Fig 16) This is where they differ from HSTs which go directly into the corner with no indent. Once the HRTs are sewn into your patchwork the will produce the perfect points!
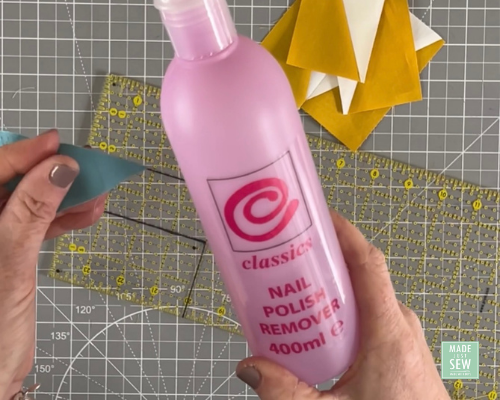
To remove any Sharpie Pen marks simple take some (cheap, nothing fancy) nail varnish remover or alcohol rub, dab a bit on a piece of scrap fabric and gently rub off the marks. (Fig 17-18)

So that’s how I do it! I hope you have found this useful and can now make the most perfect pointy HRTs!
If you have any questions please don’t hesitate to leave a comment below or contact me here.
Thanks for reading,


